背景
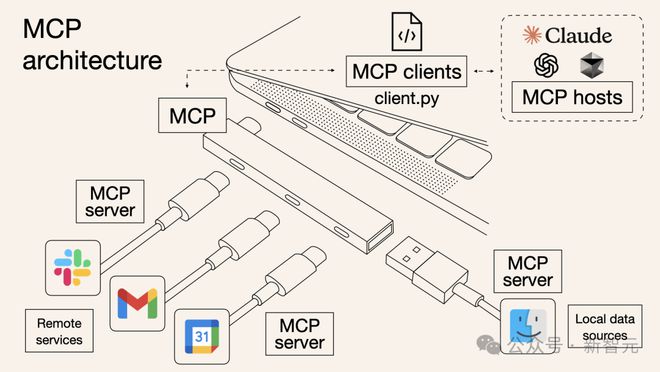
在《MCP协议简述之MCP-server实战》中,我们实现了一个本地的MCP-server,然后在支持MCP协议的客户端程序(如cursor、cherry-studio)中配置调用了该MCP-server。本章主要探索如何将MCP-server发布为远程服务,使得其他用户可以直接使用MCP-server。
回顾问题
在上一章,我们在cherry-studio中配置了获取天气的本地mcp-server,关键配置如下:
{
    "mcpServers": {
        "weather": {
            "command": "/Users/deadwalk/.local/bin/uv",
            "args": [
                "--directory",
                "/Users/deadwalk/Code/ai_proj_agent/weather",
                "run",
                "weather.py"
            ]
        }
    }
}
这种方式的主要问题是:weather这个mcp-server是本地的,只有当前本地用户才能使用,网络上的其他用户是无法使用的。
解决方案
我们需要将MCP-server进行改造,使得其他用户可以直接使用。
MCP-server改造前的实现
- 导入包并设置实例
from typing import Any, Dict
import httpx
from mcp.server.fastmcp import FastMCP

# 初始化FastMCP服务器
mcp = FastMCP("weather")

# 常量
BAIDU_API_BASE = "https://api.map.baidu.com/weather/v1/"
BAIDU_API_KEY = "8HkEwz5h********"- 实现入口函数的部分
if __name__ == "__main__":
    # 初始化并运行服务器
    mcp.run(transport='stdio')
MCP-server源码分析
通过查看FastMCP的源码,可以看到FastMCP在实例化对象的时候,是可以配置setting的
class FastMCP:
    def __init__(
        self, name: str | None = None, instructions: str | None = None, **settings: Any
    ):
        self.settings = Settings(**settings)        #  这里就是设置实例的设置

        self._mcp_server = MCPServer(
            name=name or "FastMCP",
            instructions=instructions,
            lifespan=lifespan_wrapper(self, self.settings.lifespan)
            if self.settings.lifespan
            else default_lifespan,
        )
    # 以下内容省略
进一步查看settings的源码,可以看到setting中可以配置host、port\message_path\lifespan等参数。
class Settings(BaseSettings, Generic[LifespanResultT]):
    """FastMCP server settings.

    All settings can be configured via environment variables with the prefix FASTMCP_.
    For example, FASTMCP_DEBUG=true will set debug=True.
    """

    model_config = SettingsConfigDict(
        env_prefix="FASTMCP_",
        env_file=".env",
        extra="ignore",
    )

    # Server settings
    debug: bool = False
    log_level: Literal["DEBUG", "INFO", "WARNING", "ERROR", "CRITICAL"] = "ERROR"

    # HTTP settings
    host: str = "0.0.0.0"
    port: int = 8000
    sse_path: str = "/sse"
    message_path: str = "/messages/"

    # resource settings
    warn_on_duplicate_resources: bool = True

    # tool settings
    warn_on_duplicate_tools: bool = True

    # prompt settings
    warn_on_duplicate_prompts: bool = True

    dependencies: list[str] = Field(
        default_factory=list,
        description="List of dependencies to install in the server environment",
    )

    lifespan: (
        Callable[[FastMCP], AbstractAsyncContextManager[LifespanResultT]] | None
    ) = Field(None, description="Lifespan context manager")
MCP-server改造后的实现
- 导入包并设置实例
from typing import Any, Dict
import httpx
from mcp.server.fastmcp import FastMCP

# 初始化FastMCP服务器
# mcp = FastMCP("weather")
mcp = FastMCP(
    name="weather",
    host="0.0.0.0",
    port=8000,
    description="获取指定城市的当前天气信息",
    sse_path='/sse'
)

# 常量
BAIDU_API_BASE = "https://api.map.baidu.com/weather/v1/"
BAIDU_API_KEY = "8HkEwz5h********"- 实现入口函数的部分
if __name__ == "__main__":
    # 初始化并运行服务器
    try:
        print("Starting server...")
        mcp.run(transport='sse')
    except Exception as e:
print(f"Error: {e}")- 在命令行中启动服务
uv run weather.py客户端中使用
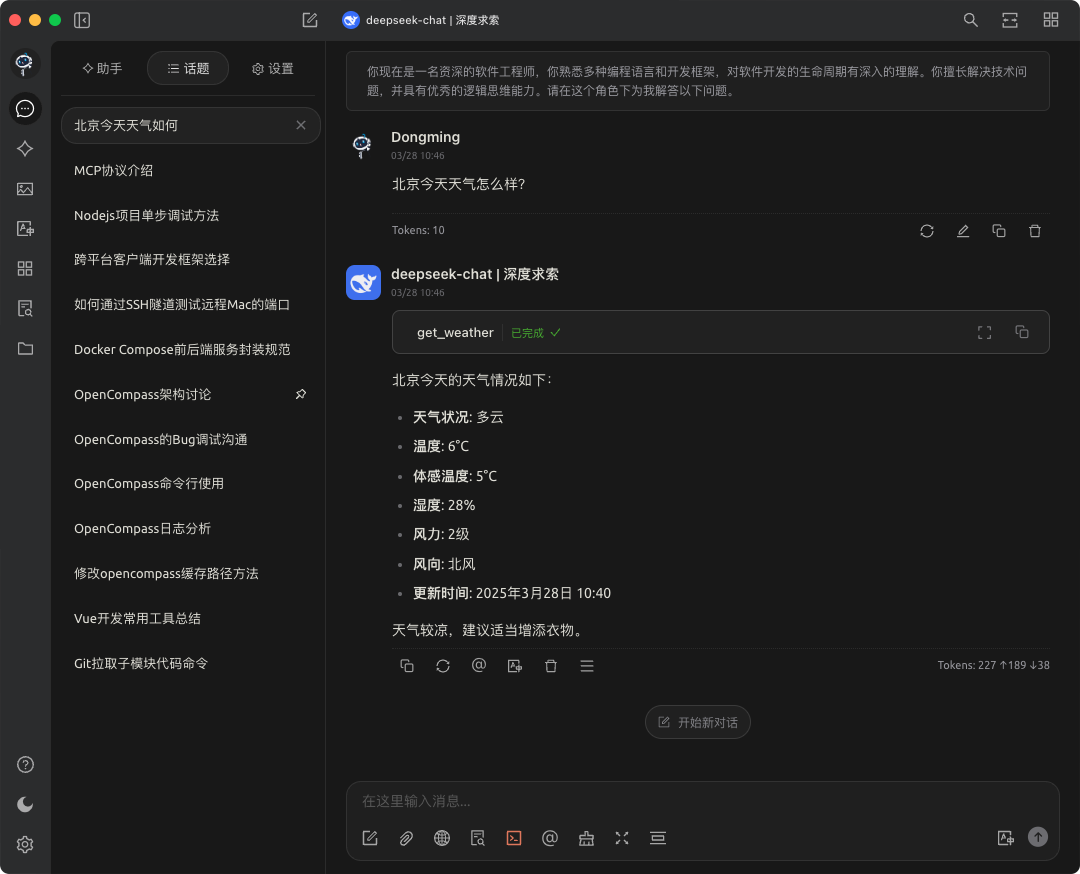
1. 在cherry-studio中集成使用
在局域网另外一台机器上,打开cherry-studio的配置,在MCP服务中配置连接如下;
{
  "mcpServers": {
    "weather_demo": {
      "description": "这是一个weather的demo",
      "isActive": true,
      "baseUrl": "http://192.168.6.164:8000/sse"
    }
  }
}
备注:
- 192.168.6.164是mcp-server的ip地址,端口为8000
- 由于我们使用的是sse协议,所以需要将baseUrl设置为sse协议,即http://192.168.6.164:8000/sse
实际实验效果:
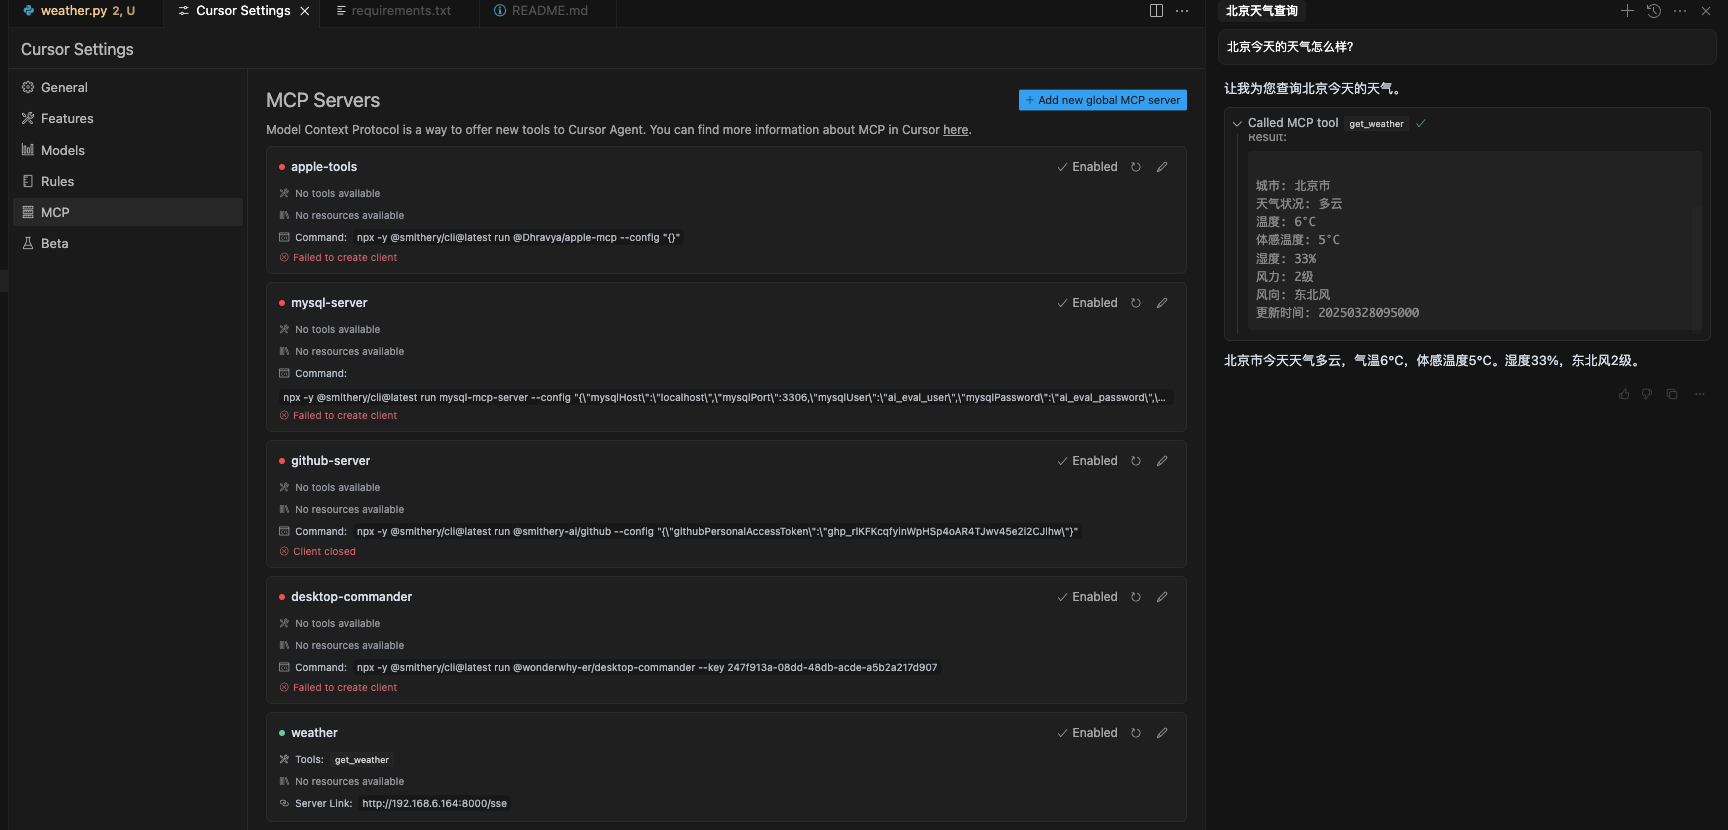
2. 在cursor中集成使用
{
  "mcpServers": {
    "weather": {
      "url": "http://192.168.6.164:8000/sse"
    }
  }

}
实际实验效果:
3. 在cline中集成使用
在cline中尝试了多种方式配置,均未能成功,在github中找到了相应的issue,可能需要关注该项目后续的修复进展。
总结
- 通过对mcp-server的改造,在实例化mcp-server的时候,配置相应的host、port,可以实现sse协议的部署。
- 通过服务部署之后,其他用户可以在支持mcp的客户端中,通过mcp-server的url进行调用。
其他文章
欢迎关注公众号以获得最新的文章和新闻